How To String A Fishing Pole
Whether you’re a total pro or a complete novice, one of the first things you’re going to want to learn when you get your new fishing pole is how to string it. Without this fundamental skill, your days of fishing will be far longer, more stressful, and less entertaining.
If you find yourself casting poorly, twisting, catching, and tangling or even failing to bring in a fish worthy of a PB, you may want to check how you’ve strung your fishing pole.
Start your fishing trips off write through this guide on how to string a fishing pole. We’ll give you a step-by-step guide, guaranteed to give you an advantage on the water.
Gather Your Resources
Going on a trip straight away, or just unboxed a new rod and are excited to try it out?
Just hold on a few moments.
Let’s see what equipment you’re going to need to make sure the trip is handled correctly.
- Fishing Rod & Reel
- Fishing Line (specific to the type of fishing)
- Hook & Lure
- Sharp instrument e.g., knife or scissors
- Electrical tape
Some equipment may be very slightly different depending on the type of fishing rod and reel that you’ve purchased. Whether you’re using a spin casting, baitcasting or fly reel, we’ve got the basic steps for you to follow in this guide.
Step-by-Step Guide: How to String a Fishing Rod
Before you even think about putting the string onto the rod, you need to ensure that your rod has been put together sufficiently. Any issues with the assembly of your rod will cause further problems down the line.
Firstly, lay your rod on a table and wipe down any debris or miscellaneous objects from your rod that could cause problems. The process of wiping down your rod is more for those that need to restring their fishing pole.
Connect each section starting with the thickest section at the bottom of the rod, ensuring that all of the guidelines are aligned properly down the rod.
Reels
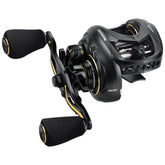
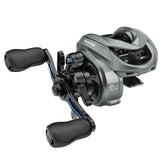
Once you have successfully assembled your fishing rod, it’s time to attach your reel.
There are two terms that you're going to need to understand: reel seat and reel foot.
Reel Seat: part of the fishing rod whereby the reel is mounted
Reel Foot: the bridging point between rod and reel

Find your reel seat on your new or existing fishing rod and open it. Then on your reel, locate your reel foot and slot it into the opened reel seat on the rod ensuring that the spool is facing in the same direction. Begin tightening the reel seat so that the reel is tightly in place on the rod, however, be careful not to overtighten the device.
Types of Knots
By now you should have a rod and reel carefully assembled. To now tie your fishing line onto the reel, you’re going to need to know the Arbor Knot.
How to Tie an Arbor Knot:
- Wrap the line around the spool with the tag end of the line. Tie an overhand knot with the tag end around the standing section.
- Tie another overhand knot just an inch from the first knot.
- Pull your standing section of the line to manoeuvre the first knot down to the spool. This will cause the second knot to collide with the first.
- Trim the tag end and close
Attaching the Line to the Reel
On your rod, you’ll find some metal hoops, called guides. Earlier, we mentioned that when you put your rod together these should all be aligned. Take your line and thread it through these hoops from top to bottom careful not to miss any of the guides.

Once you have done this, you’ll want to open the bail arm. Essentially, it is just the section on your reel where you put the wire. Tie the line onto the spool using that knot we’ve just taught you how to do.
It is super important that the line goes in the same direction onto the reel as it came off its spool, to prevent any line twisting. Any poor performance or consistent tangling of the line will be caused by poor line attachment with the spool.
Then close the bail arm and begin to wind in the fishing line on the reel. The line should be spread evenly and wrapped tightly to the spool to avoid any tangling or unnecessary knotting. Do this until the spool is full but try to leave around ¼ of an inch so that you don’t overfill the reel.
Cut the line at the spool end of the rod.
Learning another knot type
When you’re casting and wanting to attract big new catches you tend to use your favourite hooks, baits, or lures. Everyone has their favourite that they attach to the line, but to do it effectively, you’re going to need a salmon knot, otherwise known as an improved clinch knot.
Step one:
Find the end of your line and thread it through the small hole and the end of the hook (this is called the eye). Bring the line back on itself and wrap around the line 5-6 times.
Step Two:
When you brought the line back on itself you would have created a small loop. Bring the line back towards the hook and pull the line through that small loop.
Step Three:
Try to wet the knot and pull so that you can tighten down the coils. Slide it tight so that it is close to the eye and clip the tag end.
Summary
For all types of casters, it is imperative that you learn how to string your fishing pole. If an accident happens out on the water and you need to re-string your fishing pole, you don’t want to have to cut a great trip short just because you didn’t educate yourself on how to do it.
Use this guide, take it with you, or just practise with it so that you can become an expert.
Enjoy your fishing!


